Building a Home Coffee Brew Station That Actually Works
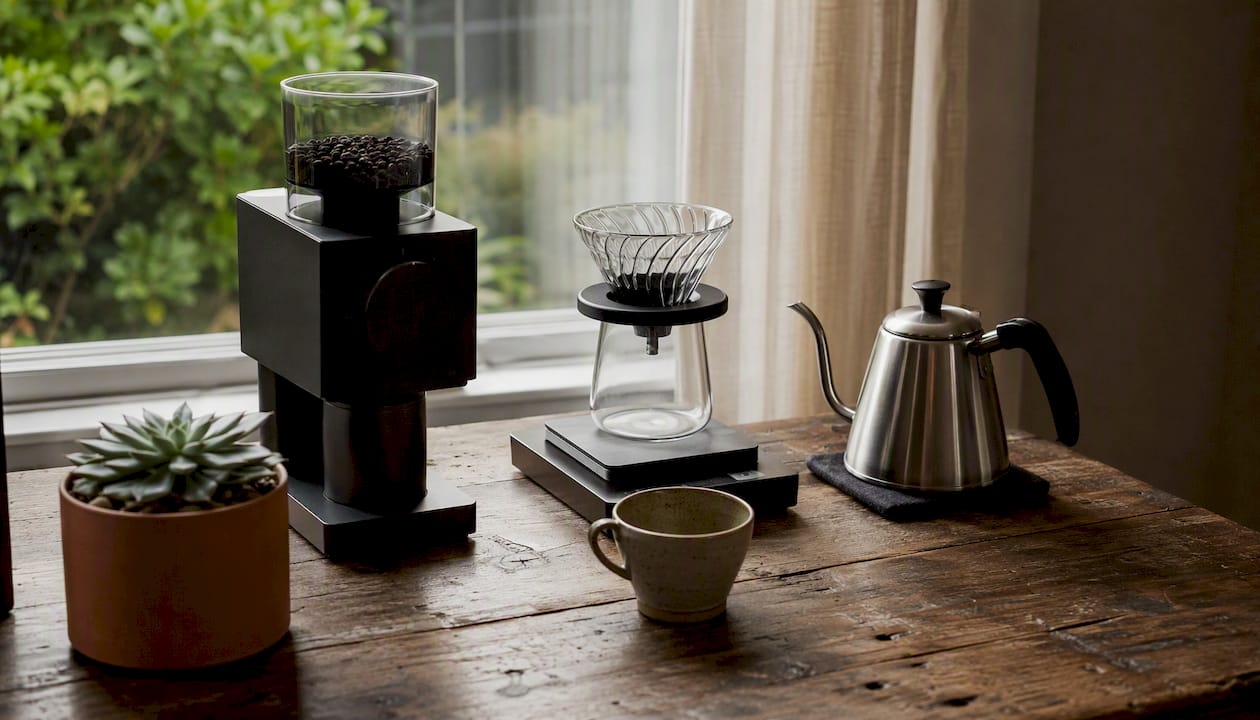
A compact, repeatable brew workflow built around a quality burr grinder, a 0.1g-resolution scale, and fresh whole-bean coffee is the fastest path to café-level cups at home. You don’t need a full kitchen renovation or a $2,000 espresso machine. Pick your brew method first, design the station around that workflow, and the rest follows naturally.
The minimal setup you need to start:
- Burr grinder (manual or electric)
- Brewer matched to your method (pour-over dripper, AeroPress, or drip machine)
- Digital scale with 0.1g resolution and a built-in timer
- Gooseneck kettle (pour-over) or standard kettle (drip/AeroPress)
- Airtight storage canister for whole beans
Quick cost tiers:
- Budget starter: affordable range suitable for manual grinder plus basic brewer and scale
- Mid-range: moderate budget for upgraded electric grinder, better dripper, and scale
- Refined/espresso: higher budget for semi-automatic machines with dedicated grinder and accessories
1:16 ratio: The standard coffee-to-water ratio is 1g of coffee per 16g of water. Lock that in before you touch any other variable.
Table of Contents
- How do you pick the right spot and layout for your station?
- Why should you choose your brew method before buying any gear?
- What equipment do you actually need, and what can wait?
- How does an espresso station differ from a pour-over setup?
- How do you organize tools, cords, and storage so the station stays usable?
- What power, water, and lighting does your station actually need?
- What does a realistic budget and build timeline look like?
- Six practical station setups for every space type
- What actually makes your coffee repeatable every single morning?
- Key Takeaways
- The thing most guides get wrong about building a coffee station
- Fresh beans delivered roast-to-order: the easiest station upgrade
- Useful sources and further reading
- FAQ
How do you pick the right spot and layout for your station?
Start with workflow, not aesthetics. Think of the station as a small assembly line: beans and grinder on the left (for right-handers), brewer in the center, mug pickup on the right. That left-to-right staging, beans → grinder → brewer → mug, keeps every morning move intentional and fast.
Counter space: A small countertop section handles a single-machine tray setup, while a larger space is more comfortable for multiple appliances like grinder, dripper, and kettle. Leave at least 15 inches of vertical clearance above any appliance for steam and safe operation.
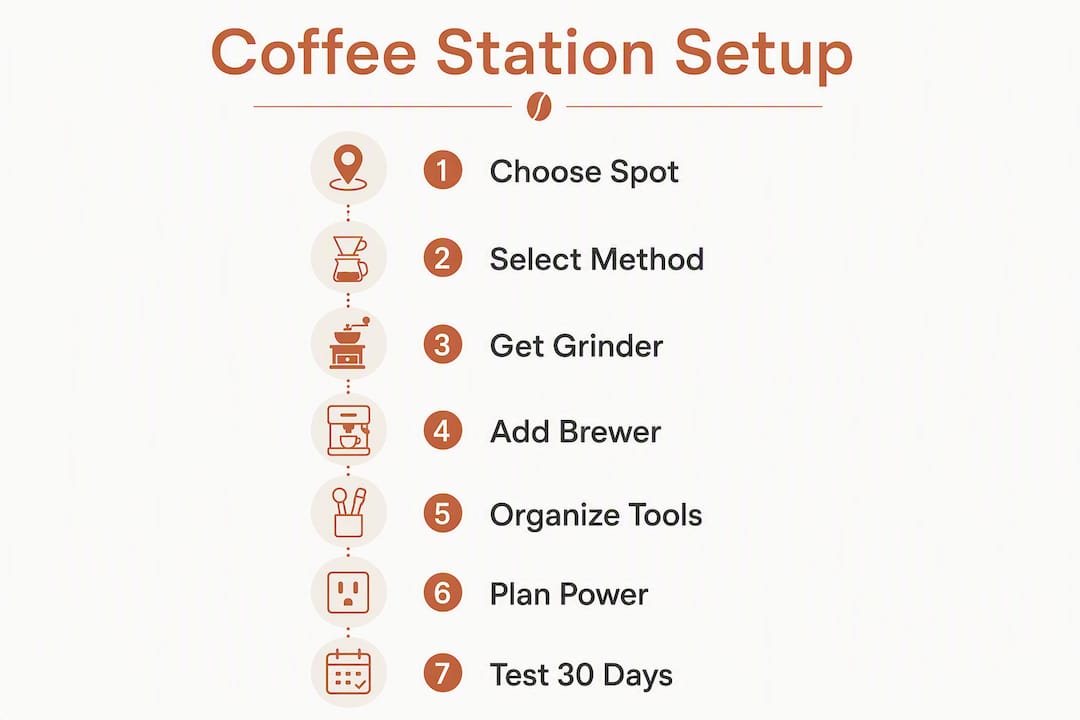
Proximity to water and power: Placing the station within 6 feet of a sink makes refilling and rinsing effortless. For power, two grounded outlets on a 20-amp circuit handle an espresso machine and kettle running close together without tripping breakers. A shared 15-amp circuit with a toaster or microwave is a recurring problem.
Surface and splash protection: Non-porous counters like quartz resist coffee stains and acidic spills without sealing. A 4-inch backsplash behind the station catches splatter from the kettle and brewer. Keep the station at least 5 feet from the stove; grease vapor settles on grinder burrs and ruins them faster than any other environmental factor.
Zones: Divide the counter into three clear areas: storage (beans, filters, tools), preparation (grinder, scale, brewer), and cleanup (drip tray, small bin for grounds). Shelving above the counter, a rolling cart beside it, or a shallow drawer below each solve a different organizational problem depending on your space.
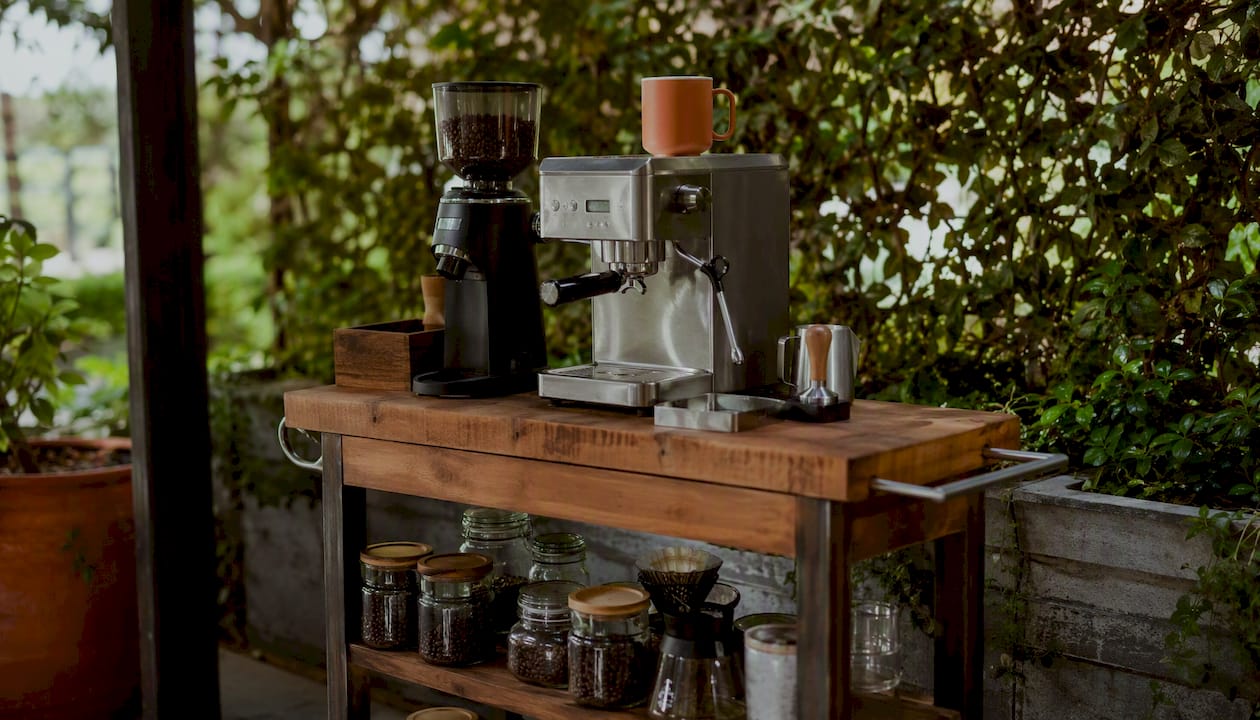
Pro Tip: If you’re renting or can’t drill, a freestanding cart with a butcher-block top gives you a dedicated station you can move, and the side hooks handle mugs without wall anchors.
Why should you choose your brew method before buying any gear?
The method you drink daily determines every other decision: gear, space, electrical load, and budget. Buying an espresso machine because it looks impressive, then realizing you mostly want a quick black coffee in the morning, is one of the most common and expensive missteps in home coffee setup.
Four questions to narrow it down:
- How often do you brew? (Daily quick cup vs. weekend ritual)
- How many cups per session? (One vs. four or more)
- Do you want milk drinks? (Lattes and cappuccinos require steam; pour-over and AeroPress don’t)
- How much do you enjoy the process? (AeroPress rewards tinkering; drip rewards consistency)
What each method demands from your station:
Pour-over (Hario V60, Kalita Wave) and AeroPress setups need a gooseneck kettle for controlled pours, a scale, a timer, and roughly 12 inches of counter space. They’re low-power, low-maintenance, and produce exceptional clarity in the cup, especially with light-roast single-origin beans.
Drip/batch brewing (Bonavita and similar) needs more counter footprint for the machine and carafe, plus reliable water access. It’s the right call for households that brew 4+ cups at once and want minimal hands-on time.
Espresso demands a dedicated 1,200–1,500W machine, a matching grinder dialed for fine grounds, a knock box, and a steam zone if you’re making milk drinks. The workflow is longer, the cleaning is daily, and the skill ceiling is higher. It’s worth it if espresso is genuinely what you want to drink every morning.
Pro Tip: If you’re undecided between pour-over and espresso, start with a V60 or AeroPress for six months. You’ll either fall in love with filter coffee or confirm that you genuinely miss espresso. Either way, you’ve spent $150 instead of $800 on the wrong machine.
What equipment do you actually need, and what can wait?
Build your stack in this order: method first, then grinder, then scale, then brewer, then kettle. Accessories come last.
Must-have vs. nice-to-have
| Equipment | Must-Have | Why It Matters | Nice-to-Have Upgrade |
|---|---|---|---|
| Burr grinder | Yes | Grind uniformity drives extraction more than any other variable | Stepped-to-stepless upgrade |
| Digital scale (0.1g + timer) | Yes | Ratio and timing control lock in repeatability | Acaia Lunar for espresso |
| Brewer (V60, AeroPress, drip) | Yes | Matched to your chosen method | Second brewer for guests |
| Gooseneck kettle | Yes (pour-over) | Controls pour rate and bloom | Fellow Stagg EKG for temp control |
| Airtight storage canister | Yes | Preserves bean freshness up to 14–21 days | Vacuum-seal canister |
| Espresso machine | No (unless needed) | High cost, high skill, high maintenance | Breville Barista Express |
| Knock box | No | Espresso only | Compact countertop model |
| Dedicated mini fridge | No | Milk drinks or cold brew | Under-counter unit |
Category leads to search when buying:
- Grinders: Baratza (electric burr, entry to prosumer), manual burr options for travel or budget builds
- Scales: Acaia (precision espresso and pour-over), budget alternatives with timer function
- Kettles: Fellow (temperature-controlled gooseneck), Bonavita (reliable, lower cost)
- Drip brewers: Bonavita (consistent bloom cycle, SCA-certified models)
- Pour-over drippers: Hario V60, Kalita Wave
- Manual immersion: AeroPress
Three buying rules worth keeping:
- A manual grinder often outperforms electric grinders at the same price point. The Comandante C40 or 1Zpresso JX-Pro beat most sub-$150 electric grinders on grind uniformity.
- Don’t start with an espresso machine unless milk drinks are non-negotiable. A $160–$250 AeroPress-plus-scale stack beats many café drip brews and teaches you more about extraction in three months than most gear upgrades do.
- Once you have a working grinder, brewer, and scale, the next upgrade that moves the cup most is water quality, not a new kettle.
How does an espresso station differ from a pour-over setup?
Espresso is a different category of home station, not just a different brewer. The gap shows up in power draw, daily maintenance, and workflow complexity.
Key differences at a glance:
- Power: Espresso machines draw substantial wattage; a gooseneck kettle draws a similar load but for a shorter burst. Running both on a shared 15-amp circuit with other kitchen appliances regularly trips breakers. A dedicated 20-amp outlet is the practical solution.
- Daily cleaning: Steam wand wiping after every use, portafilter rinsing, and backflushing with a blind basket (weekly minimum) are non-negotiable. Skip them and the machine degrades fast.
- Accessories: Tamper, distribution tool, knock box, drip tray, and a dedicated espresso grinder (fine-grind capable, ideally stepless). That’s 12–18 additional inches of counter space minimum.
- Workflow layout: Grinder and dosing area on the left, machine in the center, milk frothing zone on the right. The steam wand needs clearance above and beside it for a milk pitcher.
- Plumbing: Most home espresso machines use a reservoir you refill manually. Plumbed setups exist but require a dedicated water line and are typically reserved for semi-commercial or high-end home builds.
Espresso-specific maintenance checklist:
- Daily: wipe steam wand, rinse portafilter and basket, empty drip tray
- Weekly: backflush with blind basket, brush grinder chute
- Monthly: descale machine per manufacturer schedule, deep-clean group head gasket
Pour-over and AeroPress stations skip all of that. The daily cleanup is a 90-second rinse and wipe.
How do you organize tools, cords, and storage so the station stays usable?
Good organization is what separates a station that works on day one from one that works on day 300. The goal is zero friction: everything you touch every morning within arm’s reach, everything you rarely touch out of the way.
Storage layout that works:
- Pull-out drawer or small tray for filters, a brush, and a spare tamper
- Open shelf 12 inches above the counter for mugs (keeps them warm, keeps them visible)
- Airtight canister on the counter, 1–2 lb capacity, within reach of the grinder. Beans stay freshest in an airtight canister used within 14–21 days; skip the freezer for daily beans, since condensation on cold beans accelerates staling.
- Small compost bin or pull-out trash for spent grounds, positioned beside the grinder
Cord management: A power strip mounted under the counter or behind a small backsplash keeps cords off the surface. Velcro cable ties bundle the kettle and grinder cords together. If you have a floating shelf above the station, route cords up and behind it.
Cleaning rhythms that protect your gear:
- Daily: 90-second wipe of all surfaces, rinse brewer components
- Weekly: brush out the grinder’s burr chamber to clear stale grounds
- Monthly: run a grinder cleaner (Grindz or Urnex) through the burrs, descale the kettle with citric acid solution
Pro Tip: Keep a small microfiber cloth folded on the station itself, not in a drawer. The friction of opening a drawer is enough to skip the wipe-down. When the cloth is already there, you do it automatically.
What power, water, and lighting does your station actually need?
Most home coffee stations are under-spec’d on power and under-lit. Both problems are easy to fix before you finalize the layout.
Electrical:
- Espresso machines and high-power kettles each draw 1,200–1,500W. On a shared 15-amp circuit, running both simultaneously, or adding a microwave to the same circuit, trips the breaker. A dedicated 20-amp circuit is the right call for any espresso setup or high-wattage kettle.
- For pour-over or AeroPress stations, a standard 15-amp outlet handles the load. Two grounded outlets give you room to add a grinder and kettle without an extension cord.
Water:
- Placing the station within 6 feet of a sink makes daily refilling and rinsing fast. Most home espresso machines use a manual-fill reservoir (typically 60–80 oz), so proximity to the sink matters more than plumbing.
- Coffee is approximately 98% water. Filtered water removes chlorine and mineral flavors that mask delicate single-origin notes. A countertop pitcher filter (Brita, ZeroWater) or an under-sink filter both work; the under-sink option keeps the counter cleaner.
Lighting:
Under-cabinet LED strips rated 3,000K–4,000K deliver consistent, warm-white light that makes it easy to read the scale display and watch the pour during early-morning brews. Typical cost runs $25–$80 for a quality strip. Cooler temperatures (5,000K+) feel harsh and wash out the color of the coffee in the cup. A small task light directly over the brew zone adds targeted visibility without rewiring anything.
Surface and ventilation:
- Quartz counters resist acidic coffee spills without staining. A 4-inch backsplash behind the station protects the wall.
- Keep the station at least 5 feet from the stove. Grease vapor settles on grinder burrs and inside kettle spouts over time.
Pro Tip: Plug your grinder and kettle into a smart plug with energy monitoring for one week. You’ll see exactly how much power each draws and whether your circuit can handle both running at once.
What does a realistic budget and build timeline look like?
You don’t need to buy everything at once. A phased build gets you a working station fast and lets you upgrade with intention.
Cost breakdown by category
| Category | Budget Tier (~$75–$200) | Mid-Range (~$200) | Refined (>$600) |
|---|---|---|---|
| Burr grinder | Manual burr ~$40–$80 | Electric burr ~$150–$300 | Prosumer electric ~$300 |
| Brewer | AeroPress or V60 ~$30 | Kalita Wave or Bonavita drip ~$60 | Breville espresso ~$500–$1,500 |
| Scale | Basic 0.1g ~$15–$30 | Mid-tier with timer ~$50 | Acaia Pearl or Lunar ~$150–$250 |
| Kettle | Standard ~$20 | Bonavita gooseneck ~$40–$60 | Fellow Stagg EKG ~$80 |
| Storage | Airtight canister ~$15–$25 | Airscape or Fellow Atmos ~$30 | Vacuum-seal set ~$50 |
| Accessories | Filters, brush ~$10 | Knock box, tamper ~$30–$80 | Full espresso accessory stack ~$100–$300 |
Build timeline:
- Month 1: Burr grinder + brewer + scale. This is your working station. Brew daily, dial in one recipe.
- Month 3: Add a quality kettle and an airtight storage canister. Your workflow gets faster and your beans stay fresher.
- Month 6: Assess what’s actually limiting your cup. If it’s water, add a filter. If it’s temperature control, upgrade the kettle. If espresso is calling, plan the 20-amp circuit first, then buy the machine.
Where to save and where to spend: The grinder is the one purchase that moves the cup more than anything else. Spend here first, even if it means a cheaper brewer to start. A $100 manual grinder plus a $30 V60 outperforms a $30 blade grinder plus a $200 drip machine every time.
Six practical station setups for every space type
The right station design depends on your space, not your aspirations. Here are six setups that work in real kitchens.
Small nook (18–24 inches): A tray-based minimal setup. One grinder, one dripper, one scale, one kettle. Everything on a wooden tray that slides under a cabinet when not in use. Ideal for renters or tight counters.
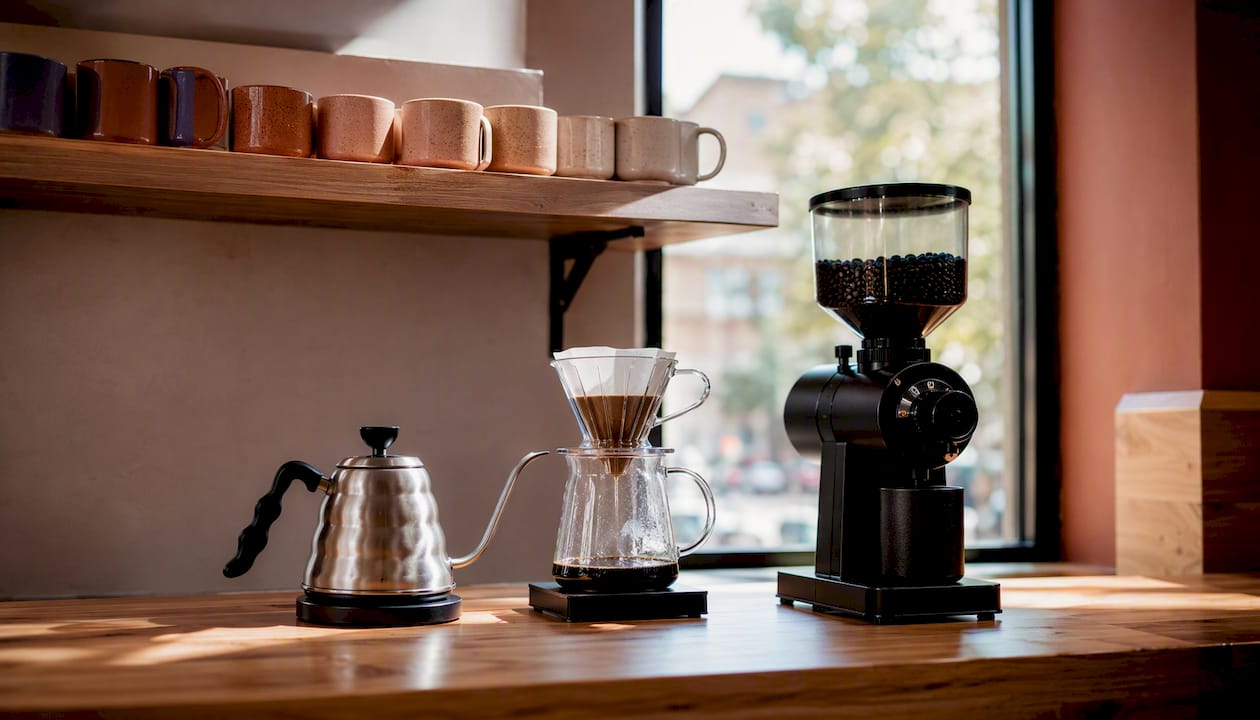
Open counter (36 inches): The most versatile layout. Grinder left, brewer center, mug shelf above. A small open shelf at 12 inches above the counter holds 4–6 mugs and keeps them accessible without a cabinet door.
Rolling cart: A butcher-block cart with a lower shelf for storage and side hooks for mugs. No drilling required, fully movable, and the lower shelf handles a small appliance or bean storage. The go-to for renters.
Built-in cabinet or butler pantry conversion: Close the doors and the station disappears. Works best with a pull-out shelf for the grinder (heavy appliances on fixed shelves vibrate and walk over time). Requires an outlet inside the cabinet.
Full coffee bar (48+ inches): Room for an espresso machine, a dedicated grinder, a milk fridge, and a full accessory drawer. This is a permanent install. Plan the 20-amp circuit before the countertop goes in.
Minimal tray setup: A single 12x18-inch tray holds a manual grinder, a small scale, an AeroPress, and a compact kettle. Costs under $200, stores in a cabinet, and produces exceptional coffee. The best starting point for anyone unsure about committing counter space.
Styling notes that stay practical:
- Matching airtight canisters (same material, same color) make the station look intentional without effort
- One small plant or a single piece of art keeps the space inviting without adding clutter
- Hook systems for mugs free up shelf space and double as display
- Closed storage hides the mess; open shelving shows off the gear
Pro Tip: Pick one accent material and repeat it: matte black hardware, natural wood, or brushed steel. Mixing three different finishes is what makes a station look cluttered even when it’s tidy.
What actually makes your coffee repeatable every single morning?
Gear gets you to the starting line. Repeatability wins the race. The most reliable home stations are built around a consistent process, not the most expensive equipment.
The core repeatability stack:
- Scale with 0.1g resolution (weighing both coffee and water, not scooping)
- Timer (built into the scale or a separate app)
- Burr grinder set to the same grind size every morning
- Fresh whole-bean coffee used within 14–21 days of roast
Commit to one recipe for 30 days before changing anything. Adjust one variable at a time: grind size first, then dose, then water temperature. Changing two things at once makes it impossible to know what moved the cup.
Water quality: Coffee is roughly 98% water, and filtered water removes the chlorine and mineral flavors that flatten single-origin profiles. This is the most-neglected variable in most home setups, and it costs less to fix than any gear upgrade.
Lighting: Under-cabinet LEDs in the 3,000K–4,000K range make it easy to read the scale display and watch the pour in low-light morning conditions. A $25–$80 strip is one of the highest-impact, lowest-cost upgrades on this list.
Fresh beans: Stale beans are the most common reason a dialed-in recipe suddenly tastes flat. A roast-to-order subscription removes that variable entirely. Beans arrive fresh, you use them within the window, and you’re not sourcing a new bag every two weeks.
Ratio anchor: The standard 1:16 ratio (1g coffee per 16g water) is your baseline. Every recipe adjustment starts from here.
For a detailed guide on dialing in light-roast coffee, the Moustachecoffeeclub brewing guides walk through grind adjustments and recipe building step by step.
Key Takeaways
A working home coffee brew station comes down to five decisions: brew method, grinder, location, power, and a 30-day repeatability commitment with one locked-in recipe.
| Point | Details |
|---|---|
| Grinder first, always | Burr grind uniformity moves the cup more than any other single purchase. |
| 1:16 ratio as your baseline | Start every recipe at 1g coffee per 16g water, then adjust one variable at a time. |
| Design around workflow | Stage beans → grinder → brewer → mug pickup; 36 inches of counter handles most setups. |
| Espresso needs dedicated power | Machines drawing 1,200–1,500W require a 20-amp circuit to run reliably without tripping breakers. |
| Moustachecoffeeclub subscription | Roast-to-order single-origin beans arrive fresh, removing stale beans as a repeatability failure point. |
The thing most guides get wrong about building a coffee station
Most home coffee guides lead with gear. Spend more, brew better. It’s a seductive idea, and it’s mostly wrong.
The stations that actually get used every day, the ones that produce great coffee six months after the initial build, share one trait: they were designed for cleaning and workflow first, and for aesthetics second. The grinder is positioned where grounds fall into the portafilter or the scale, not where it looks best in a photo. The drip tray is within reach of the sink. The cloth is already on the counter.
The other thing guides consistently underestimate is the grinder. Not in the sense of “buy an expensive one,” but in the sense of “buy a better one than you think you need.” A $100 manual burr grinder from a reputable brand produces more uniform grounds than a $60 electric blade grinder, full stop. That uniformity is what makes extraction predictable, and predictable extraction is what makes a recipe repeatable.
The third overlooked point: plan your outlets before you finalize your layout. Moving a station two feet to the left because the outlet is in the wrong place is a minor inconvenience. Discovering that your espresso machine and kettle share a 15-amp circuit with the microwave, after the countertop is installed, is a real problem.
Build for the morning you’re half-awake, not the morning you’re fully caffeinated and enthusiastic.
Fresh beans delivered roast-to-order: the easiest station upgrade
The hardest part of maintaining a great home coffee setup isn’t the gear. It’s consistently having fresh beans on hand without making a weekly trip to a specialty roaster.
Moustachecoffeeclub ships beans roasted to order, Nordic-style ultra-light single-origin coffees from Ethiopia, Colombia, and other carefully sourced origins, arriving at your door on the day they’re roasted. That means your station is always stocked with beans at peak freshness, within the 14–21-day window where flavor is sharpest. The subscription is personalized: you give feedback on each delivery, and the selections adjust to match your palate. Every shipment includes origin reports and brewing guides from the Coffee Education Hub, so you’re not just getting beans, you’re getting the context to brew them well.
For home baristas building a repeatable station, a roast-to-order subscription removes the most common failure mode: stale beans that make a dialed-in recipe taste flat. Start your subscription and choose your first single-origin roast today.
Useful sources and further reading
- Complete beginner’s coffee setup guide — foundational buy-order, 1:16 ratio, and water quality guidance
- Build Your First Coffee Stack: Step-by-Step — five-step systems approach for method, grinder, scale, beans, and space
- Countertop Coffee Station: How to Design One That Actually Works — layout, lighting, electrical, and maintenance guidance
- Best home coffee setup by budget: $75, $200, $500 — budget tiers, grinder-first rule, and storage advice
- Best Coffee Gear 2026: 20+ Essentials for Your Home Coffee Setup — gear category overview and starter stack examples
- Moustachecoffeeclub: Light Roast Brewing Methods for Home Baristas — method-specific guidance for AeroPress, V60, and drip
- Moustachecoffeeclub: How to Store Whole Bean Coffee for Peak Freshness — detailed storage advice and canister recommendations
- Moustachecoffeeclub: How to Brew Pour Over Coffee — step-by-step pour-over guide for V60 and Kalita Wave
FAQ
What is the minimum counter space needed for a home coffee station?
18–24 inches handles a single-brewer tray setup; 36 inches is the comfortable minimum for a grinder, brewer, and kettle running side by side.
Do you need an espresso machine to build a good home coffee station?
No. An AeroPress or Hario V60 paired with a burr grinder and a scale produces exceptional coffee for $160–$250 and requires far less counter space, power, and daily maintenance than an espresso machine.
What coffee-to-water ratio should you use as a starting point?
The standard baseline is 1g of coffee per 16g of water (1:16). Adjust grind size first, then dose, before changing the ratio.
How do you keep home coffee beans fresh at a station?
Store whole beans in an airtight canister (1–2 lb capacity) at room temperature and use them within 14–21 days of roast. A roast-to-order subscription from Moustachecoffeeclub keeps beans arriving at peak freshness without manual sourcing.
What electrical circuit does a home espresso machine need?
Espresso machines typically draw 1,200–1,500W. A dedicated 20-amp circuit prevents breaker trips when the machine and a high-power kettle run close together.
Recommended
- How To Brew Pour Over Coffee | Step-by-Step Guide | Moustache Coffee Club
- Coffee Education Hub | Ultra-Light Nordic-Style Brewing Guides & Origins | Moustache Coffee Club
- How to Dial In Light Roast Coffee for Home Baristas | Blog | The Moustache Coffee Club
- Coffee Accessories Gifting Guide: Matched to Every Brewer | Blog | The Moustache Coffee Club