How to Clean Coffee Equipment Step by Step
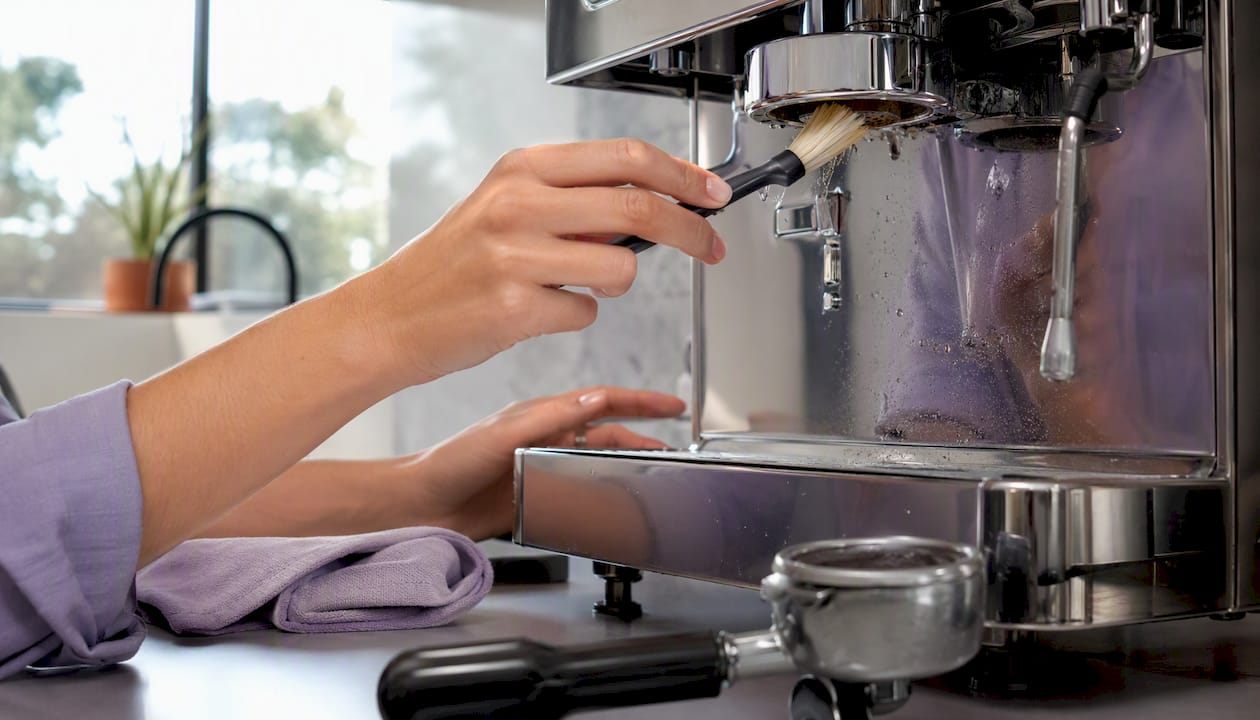
After every use: rinse removable parts, wipe contact surfaces, and purge milk lines. That three-second habit prevents the two problems that kill flavor and shorten machine life — rancid coffee oils and mineral scale. Here is the full routine, from the 30-second post-brew rinse to the monthly deep clean.
Immediate actions after every brew:
- Knock the puck and rinse the portafilter basket under hot water
- Wipe the group head gasket and shower screen with a damp cloth
- Purge the steam wand for 2–3 seconds, then wipe it with a damp cloth
- Empty the drip tray and grounds container
- Leave the water reservoir lid open so it air-dries
Weekly: backflush with detergent, soak baskets, descale drip machines if needed.
Monthly: disassemble shower screen, inspect gaskets, run a full descale cycle.
Pro Tip: Coffee oils don’t stay where you can see them. They migrate into solenoid pathways behind the group head — spots no cloth ever reaches. Only a proper backflush with a blind basket and espresso detergent clears those paths.
Table of Contents
- How do you clean an espresso machine step by step?
- How do you clean a Keurig, Nespresso, or drip brewer?
- How do you clean a coffee grinder safely?
- How do you keep a steam wand and milk system clean?
- When should you descale, and how do you do it safely?
- Maintenance schedule: your daily, weekly, and monthly checklist
- The home-barista routine Moustachecoffeeclub recommends
- Key Takeaways
- Why the cleaning step most people skip matters most
- Fresher beans make every clean count more
- Useful sources and further reading
- FAQ
How do you clean an espresso machine step by step?
Rancid coffee oils and mineral scale are the two main causes of flavor degradation and machine failure — and both are preventable with a consistent routine.
Daily routine (2–3 minutes)
Run a 10–20 second blank shot (no coffee, no portafilter) to flush the group head. Knock the puck, rinse the basket, and wipe the shower screen. Purge the steam wand immediately after frothing: open the valve for 2–3 seconds to blast residual milk, then wipe with a damp cloth. Purge once more. Done.
Weekly backflush (around 15 minutes)
Insert a blind basket into the portafilter. Add a small amount of espresso backflush detergent — brands like Cafiza or Puly Caff are widely used. Run 5–7 cycles of 10 seconds on, 10 seconds off. Remove the detergent, then run 3–4 clean-water cycles through the same blind basket to flush all chemical residue. Skip the rinse cycles and your next shot will taste like soap.
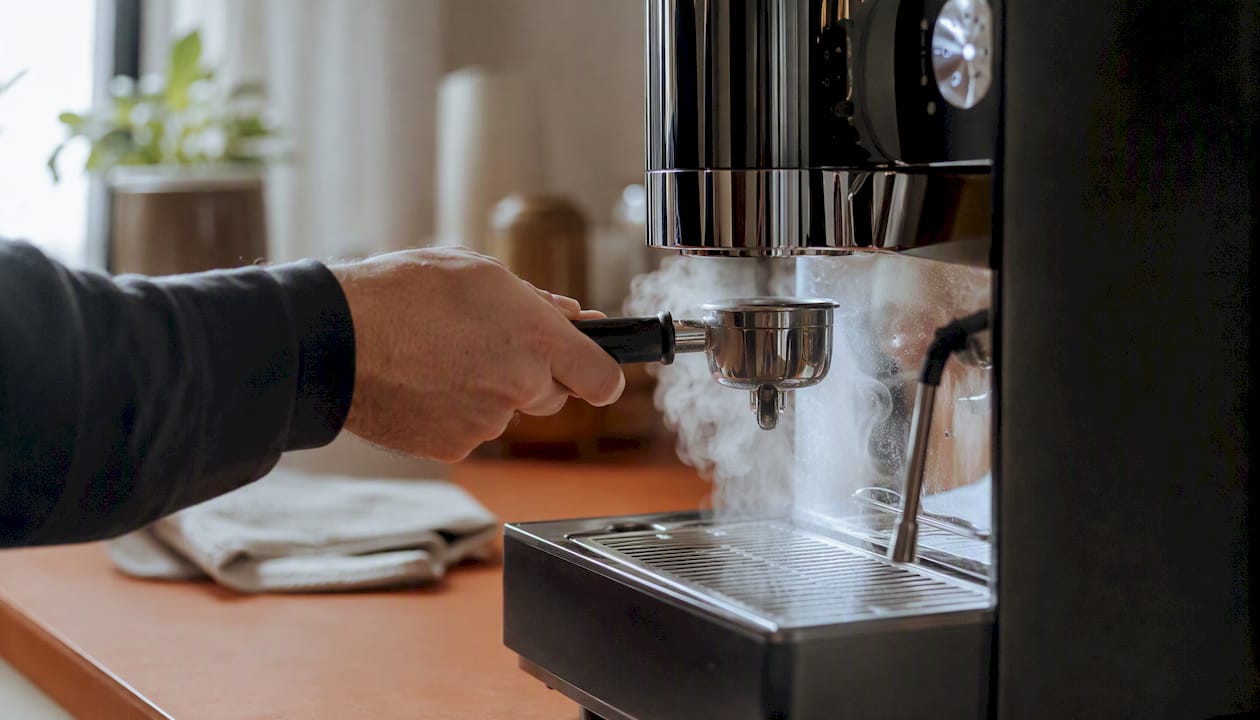
Soak the portafilter basket and any removable parts in hot water with a small amount of detergent for 10–15 minutes, then scrub with a group-head brush and rinse thoroughly.
Monthly deep clean (30–45 minutes)
Remove the shower screen (usually one screw) and soak it in detergent solution. Inspect the group head gasket for cracking or hardening — a worn gasket causes pressure loss and uneven extraction. Check your machine’s manual for the correct descaler and procedure; follow manufacturer instructions for boiler-safe products.
Safety note: Never use white vinegar in an espresso machine boiler. The acidity can damage internal components. Use only approved espresso descalers, and always run multiple clear-water cycles before brewing again.
How do you clean a Keurig, Nespresso, or drip brewer?
Quick daily and weekly actions
Wash removable parts (carafe, brew basket, drip tray) with warm water and a small amount of Dawn dish soap — it is safe for these components and cuts oils without leaving a strong residue. Wipe the warming plate and exterior. Leave the reservoir lid open after each use so it dries fully; a closed, damp reservoir is where mold starts.
Step-by-step descale for drip machines
- Empty the reservoir and remove any filter.
- Fill with a 50/50 mix of distilled white vinegar and water.
- Run a full brew cycle, then let the machine sit for 30 minutes.
- Run two to three full cycles with plain cold water to flush vinegar taste completely.
- Reassemble and brew a test cup before serving.
Lingering vinegar taste means you need one more rinse cycle. Don’t skip it.
Brand notes: Keurig recommends its own descaling solution and has a dedicated descale mode on many models — check the indicator light. Nespresso similarly recommends its proprietary descaler and a specific button sequence that varies by machine. Both brands advise against vinegar for their pod systems, so follow manufacturer guidance when the machine has a built-in descale program.
How do you clean a coffee grinder safely?
Grinder cleaning is the step most home baristas skip longest and regret most. Stale oils in the burr chamber flatten every cup, no matter how good the beans are.
Daily (30 seconds, machine unplugged):
- Empty the hopper of any remaining beans
- Brush loose grounds from the chute with a grinder brush
- Wipe the hopper with a dry cloth
Weekly:
- Remove the hopper and wash it with warm water; dry completely before reattaching
- Use a small vacuum or a dedicated grinder brush to clear fines from the burr chamber
Monthly deep clean:
- Remove the top burr if your grinder supports it (check the manual — many home grinders do)
- Brush both burr faces with a stiff grinder brush; blow out remaining fines with a can of compressed air
- Run a small dose of grinder-cleaning pellets (such as Grindz) through the machine to absorb oils before reassembly
What to avoid: Never soak burrs in water unless the manufacturer explicitly allows it — moisture causes rust and warps alignment. Skip harsh solvents entirely. Burr edges are sharp; handle them with a cloth, not bare fingers.
How do you keep a steam wand and milk system clean?
Milk residue is the fastest-growing hygiene risk in any coffee setup. At room temperature, milk proteins and sugars become a breeding ground for bacteria within hours.
Purge the steam wand the moment you finish frothing. Open the valve for 2–3 seconds to clear the tip, then wipe immediately with a damp cloth. Purge once more after wiping to clear anything drawn back in. Keep a dedicated damp cloth at the machine — not a shared kitchen rag.
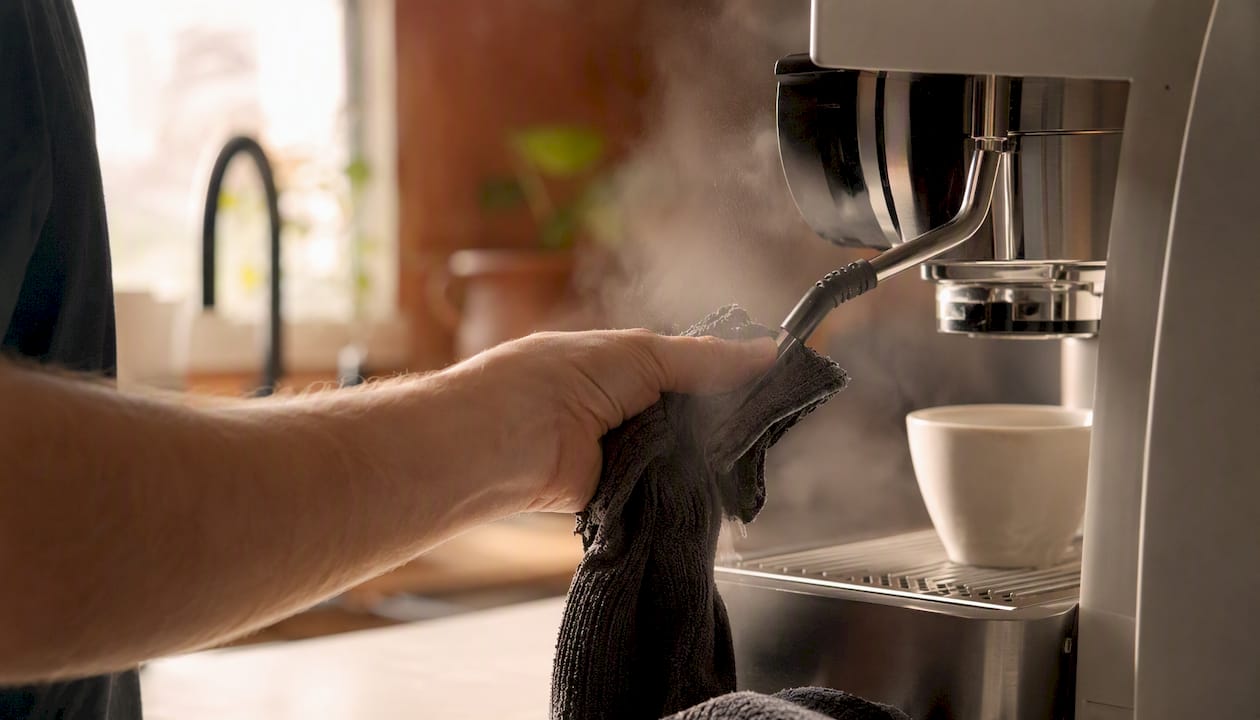
Weekly soak: Remove the steam tip (it usually unscrews) and soak it in a small cup of hot water with a drop of milk-line cleaner or espresso detergent for 10–15 minutes. Scrub the tip holes with a pin or a steam-tip brush, rinse, and reattach. For machines with automatic milk systems, run the milk-line cleaning cycle the manufacturer specifies — typically once a week for home use.
Pro Tip: A partially blocked steam tip shows up as uneven, sputtering steam rather than a clean, consistent jet. If you notice that, soak the tip immediately. A pin clears most blockages in under a minute — waiting turns a 60-second fix into a parts replacement.
When should you descale, and how do you do it safely?
Scale builds silently. By the time you taste it — flat, slow, or bitter shots — the heating element is already working harder than it should. Mineral scale insulates heating elements and narrows water pathways, so waiting for a taste signal means you are already behind.
When to descale: Use a water-hardness test strip (available at most hardware stores) to check your tap water. Soft water (under 60 ppm) means descaling every 3–6 months for most home machines. Moderate water (60–120 ppm) calls for every 1–3 months. Hard water (above 120 ppm) means monthly descaling is worth considering. Many machines also have a scale indicator light — trust it.
Safe descaling procedure:
- Empty the water tank and remove any filter cartridge.
- Fill with the manufacturer-recommended descaler solution mixed to the stated ratio. For drip machines without a specific recommendation, a 50/50 vinegar solution works — but not for espresso boilers.
- Run the descale cycle or a full brew cycle, depending on machine type.
- Let the solution sit in the boiler for the time the instructions specify (usually 20–30 minutes).
- Drain and refill with fresh cold water.
- Run at least two full clear-water cycles before brewing coffee.
- Taste a small test cup. If you detect any chemical or sour note, run one more water cycle.
Dos and don’ts: Never mix descaler with vinegar or any other chemical. Never skip the rinse cycles. Never use vinegar in an espresso machine boiler. Always check your machine’s manual for approved products — some warranties are voided by unapproved descalers.
Maintenance schedule: your daily, weekly, and monthly checklist
| Frequency | Task | Time | Why it matters |
|---|---|---|---|
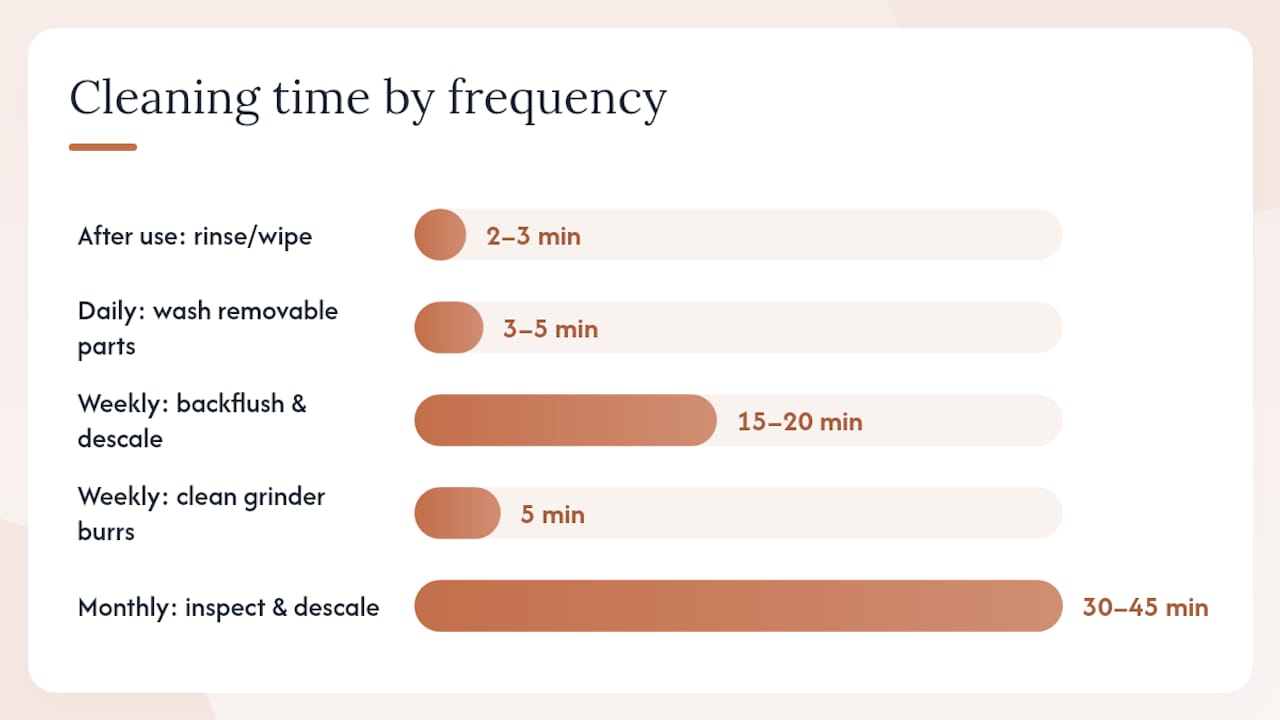
| After every use | Rinse portafilter/basket, wipe group head, purge and wipe steam wand, empty drip tray | 2–3 min | Prevents oil buildup and milk contamination |
| Daily | Wash removable parts (carafe, brew basket), leave reservoir lid open to dry | 3–5 min | Stops mold growth in damp crevices |
| Weekly | Backflush espresso machine (5–7 cycles of 10 seconds on, 10 seconds off), soak baskets, descale drip machine if needed, clean steam tip | 15–20 min | Clears solenoid oils; maintains extraction quality |
| Weekly | Brush grinder burrs, empty hopper, vacuum chute | 5 min | Removes stale fines that flatten flavor |
| Monthly | Disassemble shower screen, inspect gaskets, run full descale cycle, deep-clean grinder burrs | 30–45 min | Prevents scale damage and pressure loss |
High-volume note: Cafes pulling high shot volumes need daily backflushing, more frequent milk-system cleaning, and monthly professional servicing — the home schedule above is not sufficient for commercial output.
The home-barista routine Moustachecoffeeclub recommends
For most home setups, the full daily routine takes under three minutes: a quick group-head flush, a basket rinse, a steam-wand purge and wipe, and leaving the reservoir open. That is it. Weekly, add 15–20 minutes for backflushing and soaking. Monthly, set aside 30–45 minutes for the deep clean.
One thing that makes this easier: fresher beans produce less rancid oil residue. Beans roasted to order and shipped the same day — the model Moustachecoffeeclub uses — carry less accumulated surface oil than beans sitting in a warehouse for weeks. That does not replace cleaning, but it does mean each session starts cleaner. The coffee education resources on the Moustachecoffeeclub site include brewing guides and origin reports that pair well with this maintenance routine, particularly if you are dialing in light roast extraction where flavor clarity depends on a spotless machine.
Key Takeaways
Cleaning coffee equipment step by step — after every use, weekly, and monthly — is the single most reliable way to protect both flavor and machine longevity.
| Point | Details |
|---|---|
| Rinse and purge after every use | Flush the group head, rinse the basket, and purge the steam wand within minutes of brewing. |
| Backflush espresso machines weekly | Use a blind basket and detergent with 5–7 cycles of 10 seconds on, 10 seconds off; always follow with multiple water rinses. |
| Descale based on water hardness | Soft water: every few months; hard water: more frequently as needed. Never use vinegar in an espresso boiler. |
| Use the right cleaner for each part | Dawn for removable parts, approved detergent for internal paths, manufacturer descaler for boilers. |
| Moustachecoffeeclub supports the routine | Fresh roasted-to-order beans from Moustachecoffeeclub reduce oil rancidity, making each clean more effective. |
Why the cleaning step most people skip matters most
The backflush is the one task home baristas drop first when life gets busy. It feels optional because the machine still pulls shots. But coffee oils don’t announce themselves — they accumulate in solenoid pathways, turn rancid, and quietly corrupt every cup that follows. The shots taste “off” and most people blame the beans.
Establishing a weekly backflush routine changed the baseline quality of every shot more than any grinder upgrade or bean switch. The machine runs quieter, pressure holds more consistently, and the flavor of a well-sourced single-origin actually comes through instead of being masked by weeks of accumulated residue. Cleaning is not maintenance theater. It is the foundation the rest of the process sits on.
Fresher beans make every clean count more
Beans roasted to order and shipped the same day carry significantly less surface oil oxidation than beans sitting in retail bags for weeks. That means less rancid residue building up in your group head between cleans.

Moustachecoffeeclub ships ultra-light, Nordic-style single-origin beans roasted to order — so what goes into your clean machine is as fresh as the machine itself. Cleaning is still necessary (always), but starting with fresher beans means each session begins from a better baseline. If you want to put that to the test, start a subscription and taste the difference a clean machine and fresh beans make together.
Useful sources and further reading
- How to clean espresso machine: complete maintenance
- How to clean a coffee maker — Wirecutter / The New York Times
- How to clean your coffee maker — Consumer Reports
- Espresso machine maintenance guide
- How to Clean a Coffee Machine: Step-by-Step 2026 | Di Pacci
- How to clean a coffee maker — Good Housekeeping
- How to clean a coffee maker — EatingWell
- Coffee machine cleaning guide — Kaapi Machines
FAQ
How do you clean a coffee machine step by step?
Rinse removable parts and purge the steam wand after every use, backflush with detergent weekly using 5–7 cycles of 10 seconds on, 10 seconds off, and run a full descale cycle monthly based on your water hardness. The exact steps vary by machine type — espresso machines need backflushing; drip brewers and pod machines use a vinegar or manufacturer descaler method.
What should you run through a coffee machine to clean it?
For drip and single-serve machines, a 50/50 mix of white vinegar and water works for most models, followed by two to three plain water rinse cycles. For espresso machines, use an approved espresso detergent for backflushing and a manufacturer-recommended descaler for the boiler — never vinegar in an espresso boiler.
Can you use Dawn dish soap to clean a coffee maker?
Dawn is safe for removable parts like carafes, brew baskets, and drip trays, but it should not be used inside the machine’s water path — soap residue affects brew taste and is difficult to fully rinse from internal components.
How often should you descale a home coffee machine?
Consumer Reports recommends descaling every three to six months for most home machines, though hard water areas may require monthly descaling. Check your machine’s indicator light and your local water hardness to set the right schedule.
Does cleaning equipment actually improve coffee flavor?
Yes. Rancid coffee oils and mineral scale are the two primary causes of flat, bitter, or off-tasting cups — and both are removed by regular cleaning. A clean machine lets the actual flavor of the bean come through, which is especially noticeable with light-roast single-origin coffees where clarity and brightness define the cup.
Recommended
- How To Brew Pour Over Coffee | Step-by-Step Guide | Moustache Coffee Club
- Coffee Education Hub | Ultra-Light Nordic-Style Brewing Guides & Origins | Moustache Coffee Club
- How to Make Cold Brew Coffee | Easy Recipe & Ratio | Moustache Coffee Club
- How to Dial In Light Roast Coffee for Home Baristas | Blog | The Moustache Coffee Club