15g to 240g V60 Light Roast Recipe: Roaster Tested for Faster Dial In
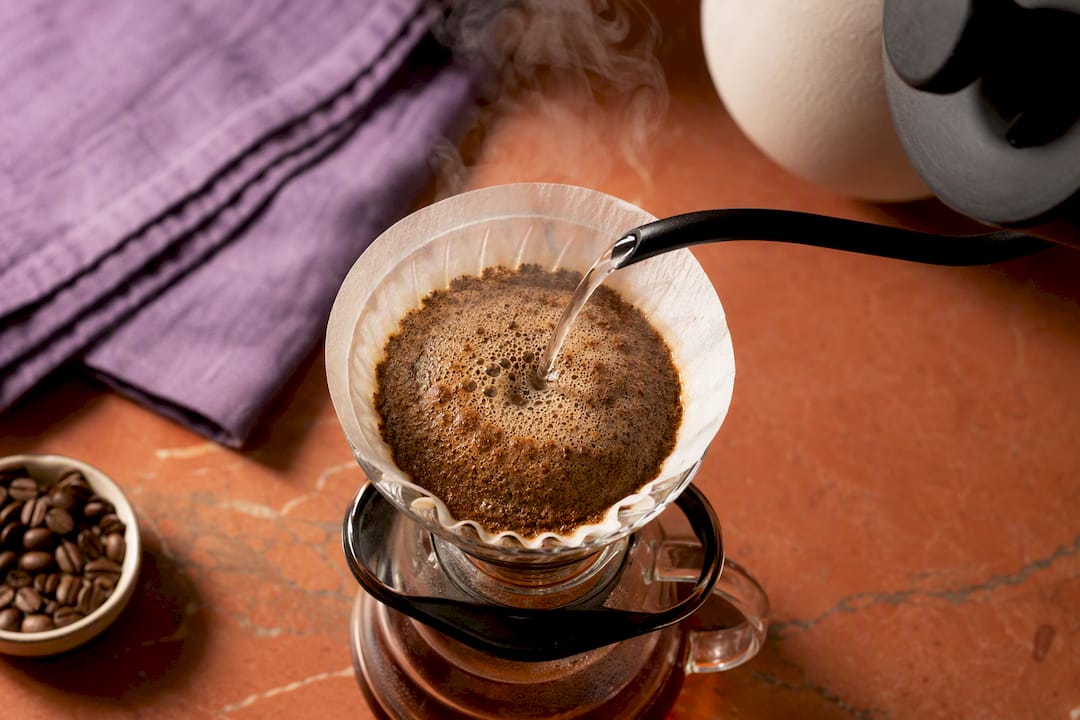
Brew light roast in a V60 with 15g coffee to 240g water (1:16), water at 96 to 98°C, a grind slightly finer than your medium setting, a 40g bloom for 30 to 45 seconds, and a total brew time of 3:00 to 3:45. From there, three rules govern every adjustment: light roasts need hotter water, a finer grind, and more contact time than darker roasts, and when the cup tastes wrong, fix grind first, temperature second, and ratio only as a last resort.
TL;DR:
- Using 15g of coffee with 240g of water at 96 to 98°C is the standard light roast brew, with a brew time of 3:00 to 3:45 minutes and a medium-fine grind.
- For a heavier, sweeter cup, increase the dose to 16g and reduce the water to 230g, but use a finer grind for proper extraction.
- To emphasize clarity and floral notes, decrease the dose to 14g, increase water to 250g, and slightly coarsen the grind.
- Proper process includes a 30 to 45-second bloom with 40g water, gentle slow pouring to avoid channeling, and precise timing and measurements.
- Adjustment priorities are grind size first, temperature second, and ratio last, as grind has the greatest effect on extraction quality.
Table of Contents
- The V60 Light Roast Recipe (Plus Two Variants)
- How to Brew It: A Timed, Gram-by-Gram Walkthrough
- What Gear and Settings Actually Matter
- Fixing a Bad Cup: What to Change First
- Barista Pour Schedules Worth Copying
- Why Roast Date Changes Your Recipe
- Best Origins and Varietals for V60 Light Roast
- Keeping Light Roast Beans Fresh Between Brews
- Adjusting for Altitude, Humidity, and Kitchen Temperature
- Why Most V60 Advice Overcomplicates Light Roast
- Sources
- FAQ
The V60 Light Roast Recipe (Plus Two Variants)
The recipe above works as your default because it splits the difference between sweetness and clarity, the two things light roasts do best when extraction goes right. Here’s the exact breakdown, plus two variants for when you want something stronger or cleaner.
Standard recipe (1:16):
- 15g coffee, 240g water
- Water temperature: 96 to 98°C
- Grind: medium-fine, close to table salt
- Bloom: 40g water for 30 to 45 seconds
- Total brew time typically ranges around three to four minutes.
Concentrated variant (1:14 to 1:15): Use 16g coffee to 230g water. Grind slightly finer to compensate for the lower ratio, and expect a heavier body with more pronounced sweetness, at the cost of some transparency. This suits washed Colombian or Brazilian lots that carry natural sugar without much acidity to balance.
Cleaner variant (1:16.5 to 1:17): Drop to 14g coffee for the same 240g water, or push to 250g. Grind a touch coarser than standard to avoid over-extracting the thinner brew. This variant highlights floral and tea-like qualities in washed Ethiopian or high-altitude Central American coffees, the kind of cup where clarity matters more than weight on the tongue.
How to Brew It: A Timed, Gram-by-Gram Walkthrough
Getting a light roast recipe to work twice in a row comes down to process, not luck. Follow this sequence and you’ll reproduce the same cup every time.
- Rinse the filter. Pour hot water through the V60 filter to eliminate paper taste and preheat the dripper and carafe. Discard the rinse water.
- Weigh and grind. Measure 15g of coffee and grind medium-fine, one or two clicks finer than you’d use for a medium roast on the same brewer.
- Bloom. Pour 40g of water evenly over the grounds, saturating them fully. Let this sit for 30 to 45 seconds. You should see the bed swell and small bubbles surface as CO2 escapes, a sign the coffee is fresh and degassing properly.
- First main pour. Pour to 150g total in a slow spiral, moving from center outward and back, avoiding the filter edge.
- Second pour. Pour to 240g total in the same steady spiral, keeping the water level roughly consistent rather than letting it spike and drain repeatedly.
- Drawdown. Let the bed drain fully. Total time from first pour to empty should land between 3:00 and 3:45.
A healthy drawdown looks even, with the bed flattening slightly and no channeling (dark streaks or a sunken crater in the grounds). If the brew drains too quickly, the grind may be too coarse; if it takes too long, the grind may be too fine or the bed disturbed by pouring technique.
Pro Tip: Pour slowly enough that the water level never rises more than about half an inch above the grounds. A fast, splashy pour agitates fines and causes uneven extraction, even if your grind and ratio are otherwise correct.
What Gear and Settings Actually Matter
You don’t need a wall of equipment to brew light roast well, but a few pieces matter more here than with darker roasts, where sloppier technique gets masked by roast-driven bitterness.
- Burr grinder with fine resolution. Light roasts are denser than dark roasts, so they resist grinding and need a grinder capable of small, repeatable steps. A grind chart helps translate “medium-fine” into an actual setting on your machine.
- Gooseneck kettle, ideally variable temperature. Precision pouring control matters as much as the temperature reading itself.
- A scale accurate to 0.1g for coffee, and one that handles up to at least 500g for water.
- A timer, phone stopwatch is fine.
- V60 dripper with matching paper filters, either the standard tabbed filters or the wave style, kept consistent so your recipe doesn’t shift with filter flow rate.
Grind matters more here than most people assume. Dense light roasts resist water penetration, so going even slightly coarser than you would for a medium roast leaves the center of each particle under-extracted while the outside over-extracts, producing a cup that’s simultaneously sour and bitter. The BaristaPath grind and temperature guide recommends going one to two clicks finer than your medium-roast baseline and pushing water temperature to 96 to 99°C. Without a variable kettle, bring water to a full boil and let it sit off heat for 30 to 45 seconds before pouring. That gets you close enough. For deeper grind logic by roast level, see Moustachecoffeeclub’s V60 grind size guide.
Fixing a Bad Cup: What to Change First
Most light roast failures trace back to one of three tastes: sour, bitter, or thin. Diagnosing correctly saves you from changing three variables at once and losing track of what actually fixed it.
- Sour and thin: Under-extracted. Grind finer by one or two clicks and raise water temperature by 2°C. This is the most common light roast mistake, since a grind that worked fine for a medium roast is often too coarse for a light one.
- Bitter or astringent: Over-extracted. Coarsen the grind slightly or drop temperature by 2°C, not both at once.
- Thin but not sour: Likely under-dosed rather than under-extracted. Add 1 to 2g of coffee before touching grind or temperature.
The adjustment order matters. Grind changes flow rate and contact time directly, so it has the biggest effect on extraction. Temperature is the second lever, moving in 2°C increments. Ratio comes last, since changing dose or water shifts strength without necessarily fixing the extraction problem underneath it.
Two pitfalls show up constantly with light roasts specifically: skipping or rushing the bloom, which leaves trapped CO2 pockets that block even saturation, and pouring too fast, which channels water around the bed instead of through it. Both produce sour, uneven cups that look like a grind problem but aren’t. For a full walkthrough on adjusting these variables systematically, Moustachecoffeeclub’s dialing-in guide breaks down the process step by step.
Barista Pour Schedules Worth Copying
Once your standard recipe is consistent, these two named schedules push the cup in different directions.
- Nordic high-temp, short-total (Tim Wendelboe style): 15g coffee to 250g water at 98°C, total brew around 2:30. Very hot water and a fine grind extract sugars fast, favoring sweetness over acidity in dense, fresh light roasts.
- Multi-pulse clarity method (George Howell style): A 1:15 ratio at 96°C with a bloom followed by four measured pours, totaling around 3:30. This slower, more deliberate schedule emphasizes floral and fruit clarity over raw sweetness.
- Input-based measured pours: Instead of tracking cumulative totals, weigh each individual pour (for example 40, 40, 80, 80, 40g). This reduces pouring error and makes a recipe easier to reproduce exactly.
Move to these only after your standard 1:16 recipe tastes right. Change one schedule at a time so you know which shift caused which flavor change.
Why Roast Date Changes Your Recipe
Moustachecoffeeclub roasts single-origin coffee ultra-light, Nordic style, and ships it day-of-roast, which means the beans you brew are often only days off the roaster, not weeks. Fresh light roast degasses more actively, so bloom times and pour timing that work for a bag that’s been sitting on a shelf will under-extract a fresher one. Subscribers can tune this over time by giving feedback on their preferences, which shapes future selections. Because roast style and freshness both shift the numbers in this recipe, pairing a fresh bag with the grind size and dialing-in guides gets you to a good cup faster than guessing.
Best Origins and Varietals for V60 Light Roast
Not every light roast performs the same way in a V60, and origin plays a bigger role here than in immersion brewing, where body tends to flatten out flavor differences anyway.
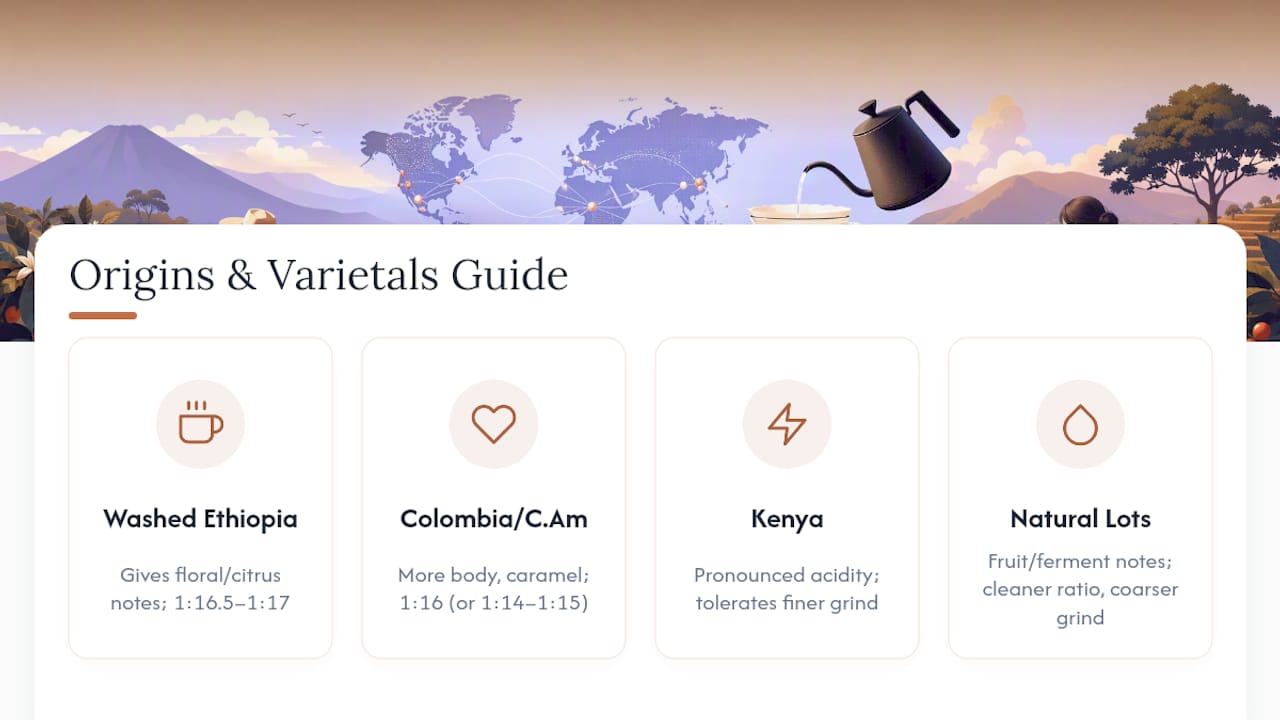
Washed Ethiopian coffees, particularly from Yirgacheffe or Guji, are the classic V60 light roast choice. Heirloom varietals bring floral, citrus, and stone fruit notes that the V60’s clean extraction and paper filter showcase well. These coffees reward the cleaner 1:16.5 to 1:17 variant, since a lighter body lets the aromatics come forward.
High-altitude Colombian and Central American coffees (Huila, Colombia; Tarrazú, Costa Rica) tend to have more body and caramel sweetness alongside bright acidity. These work well at the standard 1:16 ratio and can handle the concentrated 1:14 to 1:15 variant if you want a heavier cup.
Kenyan coffees, known for their pronounced acidity and black currant or tomato-like notes, tend to be more forgiving of slightly finer grinds since their structure holds up under longer contact time. They’re a good testing ground if you want to push toward the George Howell style multi-pulse schedule.
Natural process lots, regardless of origin, ferment longer before drying and carry more pronounced fruit and fermented notes. These can turn muddy if over-extracted, so lean toward the cleaner ratio and slightly coarser grind than you’d use for a washed coffee of the same roast level.
Varietal matters too: Gesha and Pacamara varieties tend toward more delicate, tea-like profiles that suit slower, clarity-focused pours, while Bourbon and Caturra hold up better to hotter, faster Nordic-style schedules.
Keeping Light Roast Beans Fresh Between Brews
Light roast beans lose their brightest qualities faster than dark roasts once they’re out of their peak window, because the compounds responsible for floral and fruit notes are more volatile than the heavier, more stable compounds that dominate darker roasts.
Store beans in an airtight container away from light and heat, ideally in a cabinet rather than on a counter near a stove or window. Whole beans hold freshness far longer than ground coffee, since grinding multiplies the surface area exposed to oxygen. Grind only what you need right before brewing.
Light roasts generally taste best within a few weeks of roasting. Too fresh, and excess CO2 causes uneven blooming and inconsistent extraction, which is part of why the bloom step in this recipe exists in the first place. Too far past that window, and the aromatics that make light roast worth drinking start to fade, even if the bag hasn’t technically gone stale.
Skip the freezer unless you’re storing beans for longer than a month, and if you do freeze them, portion into small airtight bags first so you’re not repeatedly exposing the whole batch to temperature swings. Never store beans in the fridge. The moisture and odors in a standard refrigerator degrade coffee faster than a cool, dark cabinet ever would.
Adjusting for Altitude, Humidity, and Kitchen Temperature
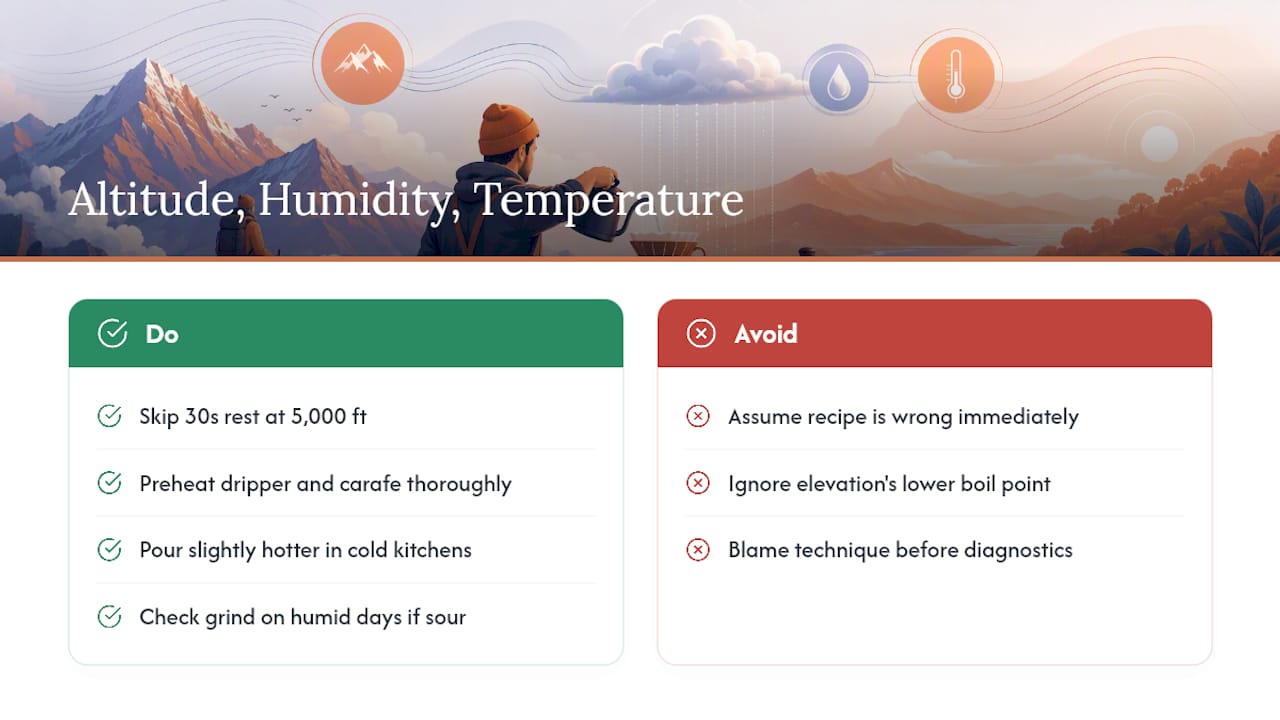
Water boils at a lower temperature the higher you go, which matters directly for this recipe since it depends on precise water temperature. At 5,000 feet, water boils around 95°C instead of 100°C, meaning “just off the boil” is already close to your target range rather than well above it. If you live at elevation, skip the standard 30 second rest after boiling, since your water may already be at or near 96 to 98°C straight off the kettle.
Humidity affects grind more than most home brewers expect. Beans absorb ambient moisture, which can cause a grinder to produce a slightly different particle distribution on a humid day compared with a dry one, even at the same setting. If your cup runs sour despite an unchanged recipe, check whether the weather shifted before assuming your technique did.
Cold kitchens pull heat out of your brew water faster during the pour itself, particularly with a V60’s exposed ceramic or glass surface. If your kitchen runs cool, preheat the dripper and carafe more thoroughly than usual, and consider pouring water slightly hotter than the standard range to compensate for the heat lost by the time it hits the grounds.
None of these factors demand a different recipe so much as a small correction to the same one. Treat altitude, humidity, and ambient temperature as inputs that shift your starting point, then apply the same grind-first, temperature-second, ratio-last diagnostic process from the tuning section above.
Why Most V60 Advice Overcomplicates Light Roast
The biggest problem with most light roast guidance is that it treats every variable as equally urgent. It isn’t. Grind size does the heavy lifting in extraction, and most sour or bitter cups trace back to a grinder setting borrowed from medium roast habits rather than any deeper flaw in technique.
Conventional advice also overstates how exotic light roast brewing needs to be. You don’t need a $400 kettle or a dozen pour patterns memorized. You need one reliable recipe, a willingness to change one variable at a time, and enough patience to taste the result before touching anything else. The Nordic and multi-pulse schedules covered here are genuinely useful, but they’re refinements, not prerequisites. Chase them after your standard 1:16 recipe is consistent, not before.
If there’s one habit worth building, it’s writing down what you change. Grind, temperature, and time drift out of memory fast, especially across different bags and roast dates. A notebook or a notes app beats guessing every time.
— Sean
Sources
For benchmark parameters beyond this guide, the BaristaPath ratio and temperature guide covers roast-level adjustments in depth. Gota’s recipe pages for the Tim Wendelboe Nordic method and George Howell’s clarity-focused approach offer exact barista-sourced pour schedules. Fellow’s grind guide helps translate grinder settings across burr types.
- V60 ratio guide: adjusting for medium vs light roast (and dark) — BaristaPath
- Nordic Light — V60 02 Recipe by Tim Wendelboe — Gota
- Official — Recipe for V60 02 by George Howell — Gota
FAQ
Can You Use Light Roast for Pour-Over?
Yes, and V60 pour-over is one of the better methods for light roast because its clean extraction and paper filter highlight the floral and fruit notes light roasts are known for.
What Is the Ideal Pour-Over Ratio for Light Roast Coffee?
Most light roast recipes fall between 1:15 and 1:17, with 1:16 (15g coffee to 240g water) working as a reliable starting point that most roasters and V60 guides converge on.
What Are the Drawbacks of Light Roast Coffee?
Light roasts are less forgiving of grind and temperature mistakes than dark roasts, since their density resists extraction and small errors show up clearly as sourness or thinness in the cup.
What Are Some Recipes for Pour-Over Coffee With Light Roasts?
Beyond the standard 1:16 recipe, try the Nordic high-temperature method (15g to 250g water at 98°C, ~2:30 total) for sweetness, or a multi-pulse 1:15 ratio at 96°C over 3:30 for floral clarity.
Ready to put this recipe to work on beans roasted for exactly this kind of brewing? Moustachecoffeeclub’s subscription delivers ultra-light, Nordic-style single-origin coffee roasted to order, so the freshness variables in this guide are already working in your favor before you even weigh out your first dose.